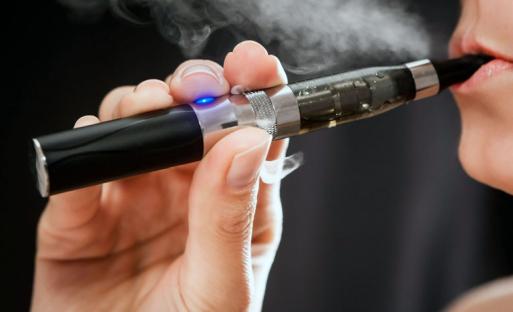
Why Cleaning Your E-Cigarette Matters
If you're among the millions of Americans who use e-cigarettes, you've probably experienced that moment when your device just doesn't taste right anymore or isn't producing vapor like it used to. The culprit? Residue buildup from e-liquid, which can affect everything from flavor quality to device performance and even your vaping experience's safety.
Regular cleaning of your e-cigarette isn't just about maintaining its appearance—it's essential maintenance that extends your device's lifespan, ensures optimal performance, and provides a better vaping experience. Whether you're using a simple pod system or an advanced mod, proper cleaning techniques can save you money on replacements and help you enjoy a consistently satisfying vape.
In this comprehensive guide, we'll walk through everything you need to know about cleaning your e-cigarette. From basic maintenance to deep cleaning procedures for different device types, we've got you covered with simple, easy-to-follow instructions that anyone can understand.
Understanding Your E-Cigarette Components
Before diving into cleaning methods, it's important to understand what components make up your e-cigarette. Different parts require different cleaning approaches:
Common E-Cigarette Components:
- Battery/Device Body – The power source and main structure of your e-cigarette
- Tank/Pod – The container that holds your e-liquid
- Coil/Atomizer – The heating element that vaporizes your e-liquid
- Drip Tip/Mouthpiece – Where you inhale from
- Connection Points – Where components connect to each other
- Airflow System – Controls airflow during inhalation
Depending on your device type, you might have additional specialized components, but these are the primary parts you'll need to maintain. Understanding these components will help you clean more effectively and avoid damaging sensitive parts.
Essential Supplies for E-Cigarette Cleaning
Before you begin cleaning your e-cigarette, gather these supplies for effective and safe maintenance:
- Microfiber cloths – Lint-free for wiping down surfaces
- Cotton swabs (Q-tips) – For hard-to-reach areas
- Paper towels – For drying components
- Warm water – Primary cleaning agent for most parts
- Isopropyl alcohol (70-91%) – For deeper cleaning (use sparingly)
- Small bowl – For soaking components
- Compressed air can (optional) – For blowing out debris
- Toothbrush with soft bristles – For scrubbing stubborn residue
- Pipe cleaners – For narrow passages and airflow channels
Having these supplies ready will make the cleaning process much more efficient. Remember that most of these items can be found in your home already, making e-cigarette maintenance affordable and convenient.
Basic Cleaning vs. Deep Cleaning: When to Do Each
Proper e-cigarette maintenance involves two levels of cleaning:
Basic Cleaning (Do This Regularly)
- Frequency: Every 1-3 days for regular users
- Purpose: Prevent buildup and maintain daily performance
- Process: Quick wipe-downs, rinses, and component checks
- Time Required: 5-10 minutes
Deep Cleaning (Do This Periodically)
- Frequency: Every 1-2 weeks for regular users
- Purpose: Remove accumulated residue and restore optimal function
- Process: Disassembly, thorough cleaning of all components, and careful reassembly
- Time Required: 20-30 minutes
The frequency of cleaning depends on how often you use your device and what type of e-liquids you prefer. Sweeter, darker e-liquids tend to leave more residue, requiring more frequent cleaning. If you notice any of the following signs, it's definitely time for a cleaning session:
- Diminished vapor production
- Burnt or off flavors
- Gurgling sounds
- Leaking issues
- Visible buildup on components
- Inconsistent performance
Step-by-Step Guide to Basic E-Cigarette Cleaning
Let's start with basic maintenance procedures that you should perform regularly:
1. Prepare Your Device for Cleaning
- Power off your device completely – Safety first! Turn off your device and remove the batteries if possible.
- Disassemble the basic components – Separate the tank/pod from the battery/mod.
- Empty any remaining e-liquid – Pour unused e-liquid back into its bottle or dispose of it properly.
- Remove the coil/atomizer – If your device has a replaceable coil, take it out.
2. Clean the Mouthpiece/Drip Tip
- Remove the mouthpiece from your tank or pod (if possible).
- Rinse it under warm (not hot) running water.
- For more thorough cleaning, soak it in warm water for 5-10 minutes.
- Use a cotton swab to clean the inside passage.
- Dry thoroughly with a paper towel, then air dry completely.
3. Tank/Pod Maintenance
- Rinse the tank with warm water (only if fully disassembled with coil removed).
- Gently shake out excess water.
- Wipe down the exterior with a microfiber cloth.
- For pod systems, use a cotton swab slightly dampened with water to clean the pod connection (be careful not to get water inside if it's not removable).
- Allow to air dry completely before refilling (this is important).
4. Battery/Device Body Care
- NEVER rinse or submerge the battery section in water!
- Use a slightly damp (not wet) microfiber cloth to wipe down the exterior.
- Clean the connection point with a cotton swab lightly dampened with isopropyl alcohol.
- Allow the connection to dry completely before reattaching components.
- Use compressed air (if available) to blow out any debris from button areas.
5. Quick Coil Check (If Applicable)
- Examine your coil for dark discoloration or buildup.
- Determine if it needs replacement (dark, burnt appearance means it's time).
- For rebuildable atomizers, dry burn to remove residue (advanced users only).
6. Reassemble and Test
- Make sure all components are completely dry before reassembling.
- Connect everything back together securely but not overly tight.
- Fill with e-liquid and allow the coil to saturate if it's new.
- Power on and test at a lower wattage first to ensure everything is working properly.
This basic cleaning should be done regularly and only takes a few minutes once you're familiar with the process. It prevents major buildup and keeps your device performing well day-to-day.
Deep Cleaning Procedures for Different E-Cigarette Types
When basic cleaning isn't enough, it's time for a thorough deep clean. The exact process varies depending on your device type:
For Tank Systems:
- Complete Disassembly
- Remove all O-rings (small rubber rings that create seals)
- Separate glass from metal components
- Take apart all threaded sections
- Remove any washers or small parts (remember their order!)
- Cleaning Solution Soak
- Place all non-electronic components in a bowl of warm water
- For stubborn residue, add a few drops of dish soap or a small amount of isopropyl alcohol
- Soak for 15-20 minutes (longer for heavily soiled parts)
- Detailed Cleaning
- Use a soft toothbrush to gently scrub threaded sections
- Clean airflow channels with pipe cleaners
- Use cotton swabs for corners and crevices
- Rinse each component thoroughly under running water
- O-ring Maintenance
- Clean O-rings separately and gently
- Check for damage or deformation
- Consider replacing if they appear worn
- Thorough Drying
- Pat dry with paper towels
- Allow components to air dry completely (at least 4-6 hours)
- Use compressed air to speed up drying in hard-to-reach areas
For Pod Systems:
Pod systems require more careful cleaning as they often have integrated components:
- Pod Examination
- Remove pod from battery
- If coil is integrated (non-replaceable), you can't fully disassemble
- If pod is refillable, empty completely
- Gentle Cleaning
- Use cotton swabs dampened with warm water to clean accessible areas
- Blow through airflow channels to remove debris
- For refillable pods, rinse with warm water if manufacturer allows
- Clean connections with a slightly damp cotton swab, then a dry one
- Battery Maintenance
- Wipe down with microfiber cloth
- Clean connection points with cotton swab and minimal isopropyl alcohol
- Allow connection points to dry completely
- Drying and Assembly
- Ensure everything is 100% dry before use
- For rinsed pods, allow at least 24 hours to fully dry
- Reassemble and fill with e-liquid
For Advanced Mods and Rebuildable Atomizers:
If you use advanced devices with rebuildable atomizers, the cleaning process is more involved:
- Coil Removal and Disposal
- Remove old coils and wicking material
- Dispose of used wicking material (cotton, etc.)
- Deck Cleaning
- Rinse the build deck under warm water
- Use a toothbrush to clean posts and screws
- For stubborn residue, use isopropyl alcohol and a toothbrush
- Ultrasonic Cleaning (Optional but Effective)
- If available, place metal components in an ultrasonic cleaner
- Use water or a water/alcohol solution
- Run for 3-5 minutes
- Post and Screw Maintenance
- Remove screws if possible and clean individually
- Check for corrosion or damage
- Apply a tiny amount of e-liquid to threads before reassembling
- Building New Coils
- Install fresh coils after cleaning
- Test for shorts or issues before wicking
- Apply new wicking material properly
Remember that rebuildable atomizers require more technical knowledge and experience to clean and rebuild properly. If you're new to these types of devices, consider seeking guidance from experienced users or watching tutorial videos specific to your device.
Cleaning Special Components: Focus Areas for Better Performance
Certain e-cigarette components need special attention during cleaning to ensure optimal performance:
1. 510 Connections
The 510 connection (where your tank attaches to the mod) is critical for proper function:
- Use a cotton swab lightly dampened with isopropyl alcohol to clean the threads
- Clean the center pin carefully without pressing too hard (it may be spring-loaded)
- Allow to dry completely before reattaching components
- Check for corrosion or damage regularly
2. Airflow Systems
Proper airflow is essential for vapor production and flavor:
- Use pipe cleaners to clean through airflow channels
- Remove visible buildup from airflow control rings
- Ensure airflow holes are completely clear of debris
- Test by blowing through channels after cleaning
3. Fill Ports
E-liquid fill ports can accumulate residue that affects filling:
- Clean around fill ports with cotton swabs
- Remove dried e-liquid from port edges
- Check silicone seals for damage
- Ensure ports open and close properly after cleaning
4. Button Mechanisms
For devices with buttons, regular cleaning prevents sticking:
- Use compressed air around button edges
- Wipe around buttons with slightly damp microfiber cloth
- If buttons stick, use a minimal amount of isopropyl alcohol on a cotton swab
- Never spray liquid directly onto buttons
E-Cigarette Cleaning: Common Mistakes to Avoid
Even with the best intentions, cleaning mistakes can damage your device. Avoid these common errors:
1. Using the Wrong Cleaning Agents
Mistake: Using harsh chemicals like bleach, ammonia, or strong solvents. Better approach: Stick to water, mild dish soap, and isopropyl alcohol only.
2. Submerging Electronic Components
Mistake: Putting battery sections or boards in water. Better approach: Only use slightly damp cloths on electronic parts.
3. Impatient Reassembly
Mistake: Reassembling while components are still wet. Better approach: Allow EVERYTHING to dry completely, even if it takes 24 hours.
4. Forcing Components Together
Mistake: Using tools or excessive force when reassembling. Better approach: If components don't fit easily, check alignment and try again gently.
5. Ignoring O-rings
Mistake: Forgetting to clean or replace damaged O-rings. Better approach: Clean O-rings separately and inspect for damage.
6. Using Cotton Balls
Mistake: Using cotton balls that leave fibers behind. Better approach: Use only microfiber cloths and cotton swabs.
7. Cleaning Too Rarely
Mistake: Waiting until performance issues are severe. Better approach: Establish a regular cleaning schedule.
Maintenance Schedule for Long-Term E-Cigarette Care
To keep your e-cigarette in optimal condition, follow this maintenance schedule:
Daily Maintenance
- Wipe down exterior with dry microfiber cloth
- Check for e-liquid leakage
- Clean mouthpiece with a quick rinse or wipe
Weekly Maintenance
- Basic cleaning of tank/pod
- Connection point cleaning
- Airflow check and cleaning
Bi-Weekly to Monthly
- Deep cleaning of all components
- O-ring inspection and replacement if needed
- Thorough checking of all threaded connections
Quarterly
- Inspect for worn components that may need replacement
- Check battery performance and consider replacement if declining
- Deep clean areas that are often overlooked (airflow control, fill mechanisms)
Safety Precautions When Cleaning E-Cigarettes
Safety should always be your priority when handling and cleaning e-cigarettes:
Battery Safety
- Always remove batteries when possible before cleaning
- Never expose batteries to water or excessive moisture
- Check battery wraps for damage during cleaning
- Allow battery contacts to dry completely before use
Electrical Component Protection
- Keep water away from any circuit boards or electrical elements
- Use minimal moisture when cleaning around buttons or screens
- Never submerge devices with internal batteries
- Ensure all electrical components are completely dry before powering on
Chemical Safety
- Use isopropyl alcohol in well-ventilated areas
- Avoid breathing in alcohol fumes
- Keep cleaning solutions away from children and pets
- Wash hands after handling isopropyl alcohol
Fire Safety
- Allow all traces of alcohol to evaporate before using device
- Never clean near open flames
- Don't use hairdryers or heat guns to speed drying (can damage components)
- Store cleaning supplies properly away from heat sources
Troubleshooting Common Issues After Cleaning
Sometimes issues can occur after cleaning. Here's how to address them:
Device Not Powering On
- Ensure it's completely dry before attempting to power on
- Check battery connections for cleanliness
- Verify battery orientation is correct
- Allow more drying time if uncertain
Leaking After Reassembly
- Check that O-rings are properly seated
- Ensure all components are tightened appropriately (but not over-tightened)
- Verify all parts are aligned correctly
- Inspect for damaged components that may need replacement
Poor Vapor Production
- Check coil installation
- Ensure airflow is properly cleaned and open
- Verify wattage settings are appropriate
- Check battery charge level
Burnt Taste After Cleaning
- Ensure coil is properly saturated with e-liquid
- Start at lower wattage after cleaning
- Replace coil if it looks damaged or heavily used
- Check that no cleaning residue remains
Gurgling Sounds
- Check for excess liquid in the chimney or airflow
- Ensure proper reassembly of all components
- Verify coil is installed correctly
- Remove excess liquid with paper towel if present
Special Cleaning Considerations for Different E-Liquid Types
The type of e-liquid you use affects how you should clean your device:
High-VG E-Liquids
- Tend to be thicker and leave more residue
- Require more frequent deep cleaning
- May need longer soaking to remove buildup
- Often require more attention to airflow cleaning
Sweetened E-Liquids
- Leave the most residue on coils and in tanks
- Require more frequent cleaning of all components
- May need stronger cleaning solutions (more isopropyl alcohol)
- Often cause faster coil degradation
Clear/Unflavored E-Liquids
- Generally leave less residue
- Allow longer intervals between deep cleanings
- May still require regular maintenance of connections
- Less likely to cause gunked coils
Salt Nicotine E-Liquids
- Commonly used in pod systems
- Can leave crystalline residue in some cases
- Require careful cleaning of pod connections
- May need special attention to mouthpiece cleaning
Professional Cleaning vs. DIY: When to Seek Help
While most e-cigarette cleaning can be done at home, there are times when professional help might be beneficial:
When to DIY Clean:
- Regular maintenance cleaning
- Standard residue buildup
- Simple device types
- When you have all necessary supplies
When to Consider Professional Cleaning:
- After liquid damage to electronic components
- For expensive or collector devices
- When internal components are affected
- If device performance issues persist after cleaning
- For intricate custom devices with complex designs
Many vape shops offer cleaning services or can guide you through proper maintenance for your specific device. Don't hesitate to ask for help if you're uncertain about cleaning a particular component.
Eco-Friendly Cleaning and Disposal Practices
Be environmentally conscious when cleaning and maintaining your e-cigarette:
Eco-Friendly Cleaning:
- Use biodegradable dish soap when possible
- Minimize paper towel use by using reusable cloths
- Conserve water during rinsing procedures
- Choose eco-friendly cleaning tools
Responsible Disposal:
- Recycle batteries according to local regulations
- Dispose of used coils properly (they contain metal)
- Clean and recycle empty e-liquid bottles when possible
- Never throw e-cigarette components in standard trash
Reducing Waste:
- Use rebuildable atomizers to reduce coil waste
- Purchase larger bottles of e-liquid to reduce plastic waste
- Maintain devices properly to extend their lifespan
- Consider recyclable packaging when purchasing supplies
Conclusion: Making Cleaning Part of Your Vaping Routine
Cleaning your e-cigarette properly isn't just about maintenance—it's about enjoying the best possible experience while extending the life of your device. By incorporating regular cleaning into your vaping routine, you'll save money on replacements, enjoy better flavor, and avoid many common issues that plague vapers.
Remember that different devices have different needs, so always consult your device's manual for specific cleaning instructions. When in doubt, start with gentler cleaning methods and progress to more thorough techniques as needed.
With the comprehensive cleaning methods outlined in this guide, you now have all the knowledge you need to keep your e-cigarette performing at its best. Clean devices provide better flavor, more consistent vapor production, and a more satisfying experience overall—making the small time investment in cleaning well worth the effort.
FAQ: Common Questions About E-Cigarette Cleaning
Q: How often should I clean my e-cigarette? A: Basic cleaning should be done every 1-3 days for regular users, with deep cleaning every 1-2 weeks. Adjust based on usage and the type of e-liquid you use.
Q: Can I use soap to clean my tank? A: Yes, a small amount of mild dish soap can be used for deep cleaning of non-electronic components. Ensure all soap is thoroughly rinsed away and components are completely dry before reassembly.
Q: Is it normal for my coil to change color? A: Yes, coils naturally darken with use as e-liquid residue accumulates and the wire oxidizes. However, extremely dark or blackened coils indicate it's time for replacement.
Q: Can I clean my coils to make them last longer? A: While you can rinse factory coils to extend their life slightly, they cannot be fully restored once gunked. Rebuildable coils can be dry burned and rewicked for longer life.
Q: How do I know if water got into my device's electronics? A: Signs include erratic behavior, screen glitches, inconsistent firing, or complete failure to power on. If you suspect water damage, remove batteries immediately and allow the device to dry completely for at least 48 hours.
Q: Can I use alcohol on all parts of my e-cigarette? A: No. Use isopropyl alcohol sparingly and only on non-porous parts. Avoid using it on plastic components, O-rings, or delicate materials that could be damaged.
Q: My tank is stuck together. How can I disassemble it safely? A: Try using rubber gloves for better grip, placing the tank in the freezer for 10-15 minutes to contract the metal, or using strap wrenches designed for this purpose. Never use pliers or other tools that could damage components.
Q: How do I prevent e-liquid residue buildup? A: Wipe down components regularly, avoid overfilling tanks, and clean connection points frequently. Using less sweetened e-liquids can also reduce buildup.
Remember, proper maintenance is the key to a satisfying and long-lasting vaping experience. When in doubt, consult your device manufacturer's guidelines or seek advice from reputable vape shops or online communities.